
Showing posts with label Fan. Show all posts
Showing posts with label Fan. Show all posts
Monday, July 21, 2014
IRCC4-feathery progress
After curling the plumes I used the same thread binding technique to assemble some plumes into multicolored sets.
Saturday, July 19, 2014
IRCC4 - Wow, Feathers take a lot of prep work!
But all my 48 are now trussed up in sets of two and curling has commenced. The nice part is that the curling is dead easy and goes fast!

Wednesday, July 16, 2014
IRCC4 - Feather work commences
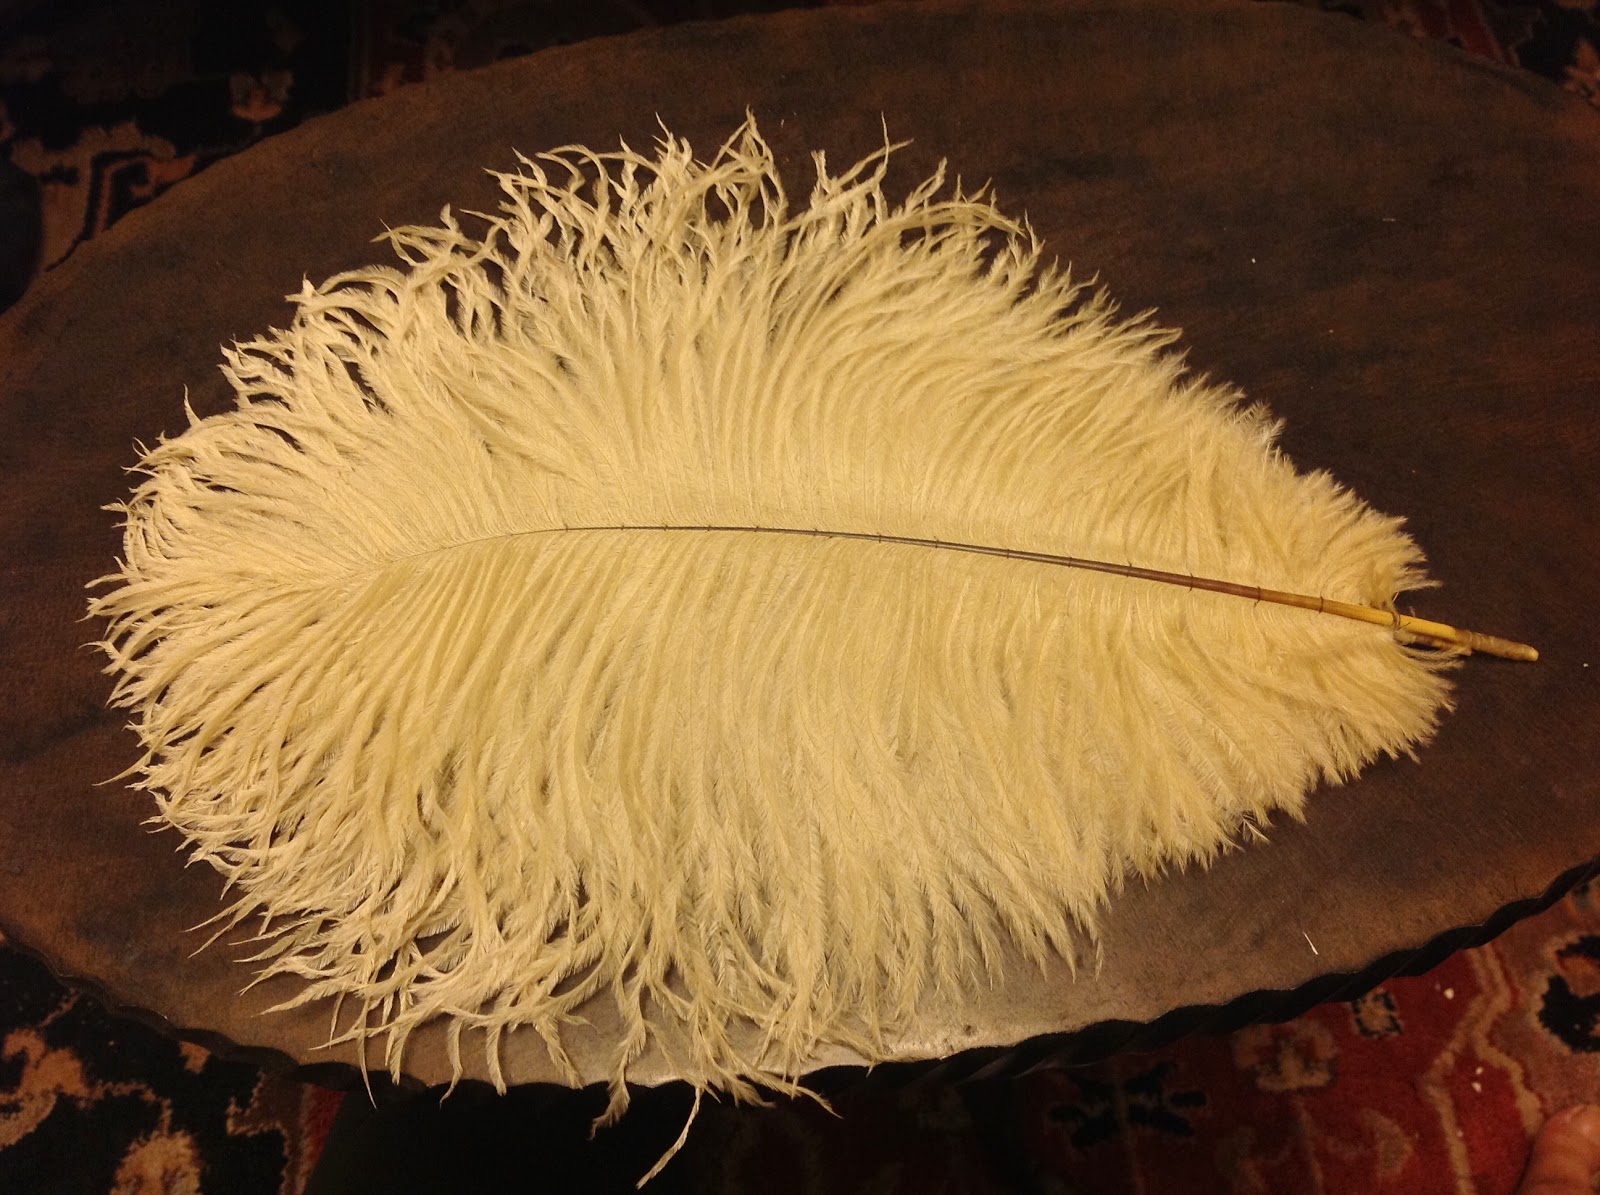
When I was working on my last feather fan I discovered an excellent tutorial regarding creating full beautifully shaped ostrich feather plumes: http://lynnmcmasters.com/OstrichPlumes.html.
In my opinion the feathers for this year's fan shouldn't be all that long, but they do need to be lush and curvy so the first step is to take the feathers I purchased and convert them into plumes! Interestingly, the process is rather like tying up a roast. You create a series of connected loops which hold the feathers together and tie them off at the end. I did mine thus:
Match feathers together in sets of two as best you can. I look for feathers which are similar in length and curve and which will complement each other when assembled. This means that I wouldn't pair together two feathes which were both skimpy on the right side, but I would pair a right-side-skimpy feather with a full or left side skimpy one.
I stack the better looking feather on top of the less handsome one, flip them over so I am facing the backs and match the tips so the lengths look well. I take a needle threaded with a length of thread approximately three-to-four times the length of the feathers I'm working on and take a stitch around the stem by sticking the needle between the quills of the feather and coming back on the other side.
Then I tie the two ends of the thread together in a square knot, leaving one tail extending about 5" past the length of the feathers and the other with the bulk of the thread on the needle.
And then I get a little wild. I left the long tail because I want to be able to tie off in a square knot also, but I don't want the bulk of two threads when I'm stitching the feathers together so I lift the upper feather and work the thread clear of all the quills so that I can run my long tail down the center spine between the feather layers.
Once I close my little feather and thread sandwich back up I start stiching them together just as instructed, making a chain of loops to encase both spines and my thread tail.
I make multiple loops at the end an finish it off with another square knot.
To finish I rescue any trapped quills by pulling them out with a pin so the whole feather looks beautiful
Much better!
Thursday, July 10, 2014
IRCC4 - Mango, Marigold, Ivory, Beige. The Feathers are Here!
This year's inspiration fan is a fluffy multicolor marvel.

Since the feather selection in my town has dropped off considerably of late (and it was never good) I decided to finally try getting feathers on the internet. Did you know they come in colors? LOTS of colors! And many sizes, types and prices too. The inspiration fan strikes me as being fairly equal amounts of four different colors. I got 4 12-packs of dyed ostrich feather drabs in the 9"-12" length.
I plan to pair them up and stitch them together to make 6 plumes of each color. Perhaps I'll have extras!
Wednesday, July 9, 2014
IRCC4 - Parts for my fan have started to arrive
After a short stint of shopping on e-bay I found a great option for a metal frame for my first accessory item. I think this hairbrush will make a great feather fan!


Step one was to take it apart. The brush is held in the frame with three short nails so I just pried them up and pulled out the bits I found.


As you can see, there's quite a lot of stuff in there!
The original brush-head is wood and perfectly shaped to fit the frame so I will probably try to use it to hold my feathers. I think I can remove what remains of the original bristles pretty easily (they are in the disintegrating phase) and if I drill the original holes all th way through the board I should have lots of attachment points. Now I just have to keep resisting the urge to use it as a giant bubble wand!
My feathers are due to arrive today or tomorrow so I hope to make some progress on this layer this weekend.
Saturday, August 17, 2013
IRCC3 - Whew! It's over and I am TIRED!
I'm also not done, as my bodice has yet to be started and the camicia embroidery project may well outlive me, but I finished my final report and can now rest and speak to my husband for a few days before recommencing. I think he will like that :)


Sunday, July 14, 2013
IRCC3 Project 4....something.....done!
I scampered off to the store today to get some more supplies for my golden chain girdle, more acorns and jump rings, but discovered that they did't have any jump rings which compared to the ones on the original acorn chain which I had been using to assemble the belt. Given the choice of going smaller or larger in diameter I went with larger.
I assembled the belt so that the acorns on both ends are top up, pointy end down when the belt is being worn, but that meant I needed to do some fancy maneuvering to end up with two acorns with their caps back to back at my spine and sufficient chain in front to fall under the waist point of a Venetian bodice and also enough dangling chain to hold and use the fan. But not so much the fan dangles on the floor when I'm standing! I think I had it figured out pretty well, but then I ended up making some changes to my belt. So I guess we'll see when it all comes together.

As you can see from the picture, above, the original jump rings were small enough that they drew two links they were joined to together and caused a small gap between the links of the main chain. I loved the intricate, interlace look that gave the girdle, but it also substantially weakened and shortened the girdle so I ended up replacing all the jump rings with my new, larger, rings.

It all hangs quite smoothly, now.
IRCC 4d? Anyway, It's another accessory! (or part of one)
You know how it is.
I finished my fan and spent a couple of days glorying in my accomplishment...and then I started thinking that now that I have a feather fan with a hanging ring I need a girdle to hang it from. So I go to the hardware store and buy a package of a nice, slightly ornamental, gold colored chain and I'm thinking "OK. I got the chain. Now I go home, measure out the correct length, bend some hooks, throw it together and hit it with Rub n' Buff so it kinda matches the fan. Done!"
Of course, that's not how it's working out. :)
Once I had the chain home, and the fan attached, it just started seeming...skimpy. It is nice chain, and the correct scale but it needed more ornamentation to complement the fan. I was pondering the possibilities of wired on filigree pieces, or pearls. Then it occurred to me that the leftover acorns from my hairpin project were a good size for putting in the spaces between the links and a few minutes later my new girdle was begun! I'm suspending the acorns between two links so they fall in the middle of the alternate link and I like the look and feel a lot but the whole project is on hold overnight because I need more jump rings.
In the morning I'll be off to the store and I'm hoping to return with more of the acorns and jump rings plus thread to match the sottana which I am finally working on. (Surprise!)
The original chain, disassembled, and reassembled

Wednesday, July 10, 2013
IRCC3 Layer 4b Update: The Orsi fan is finished!
After the gold paint dried I discovered that while it was wonderfully shiny it was that horrible green-gold color that I loathe in metallic spray paint. Luckily, I had provided myself with an alternative, Rub n' Buff!
I had never used it before, but after years of watching it transform items on HGTV I just had to give it a try. I love it! It warmed the color right up, smoothed out minor imperfections in the surface and makes a lovely texture to hold.
The next step was steam curling my Ostrich plumes and the three smaller single feathers I got for the front side of the fan. I only did the upper 1/4 of the larger feathers but I curled the entire length of the front feathers. then I stuck the feathers in their slots and stuck in some shredded toilet paper between the feathers to hold them in place while still making it easy to remove and replace the feathers if needed.
Done!


Tuesday, July 9, 2013
IRCC3, 4b - pre assembly prep work on the fan
I've realized that I neglected to chronicle and photo document the most important part of the fan--most important from a structural perspective, at least--the top opening and double pockets where the feathers will be inserted!
As you may remember, I made a cardboard spacer which I tied to the central upright oval of craft wood I had attached to the wood candleholder which forms the base of my fan handle. I then built up an outer layer of plastic wood which I have since used as the base for my paperclay top coat. I removed the cardboard spacer a while ago and have been carefully preserving the opening as I completed the adjoining sculptural elements.
Side view of the fan featuring the dragon's head

And the top opening.


I am planning to make my feathers white on the front and black on the back and it seemed to me that support between the layers would be a good thing--thus the double pockets. I assembled the main feathers by stitching the spines together in pairs (the thread wraps around the front of the rib and then loops around itself and is carried up the back of the feather to the next stitch, rather like tying a roast) using the instructions in Lynn McMaster's article, How to Create Ostrich Plumes. I plan to curl the feathers too and then assembly is next!
Tonight I painted the fan gold. After it is fully dry I'll decide if that is enough or if it needs additional painting but here is a peek.

Monday, July 8, 2013
IRCC3 Layer 4b-Fan handle sculpting is complete!
I added the final flourishes to the dragon-leafy things that stick out at the sides of my fan and managed some passable leaf shapes on the lower handle which left me with only the uncharted territory of the back to address. Orsi's design doesn't include a reverse image so I set out to look for something suitable...without much luck until I had the happy thought of looking at Orsi's's other work and found this frieze with a suitable cartouche
Some day I'll actually have a registered device which I will paint onto it!

Back

Front
Hopefully I'll move on to painting tomorrow.
 |
Ornamental FriezeLelio Orsi (called Lelio da Novellara) (Italian, Novellara 1508/11–1587 Novellara) |
Some day I'll actually have a registered device which I will paint onto it!

Back

Front
Hopefully I'll move on to painting tomorrow.
Sunday, July 7, 2013
IRCC 4b- More pretty pictures of the fan in progress
One interesting thing about the paperclay is that it doesn't particularly want to stick to the dry version of itself. I was using it more like plasticine--adding it in layers and attempting to work to a level of perfect detail--but paperclay seems to respond better to a freer approach. I've been wetting down the dry surfaces to make them more receptive to additions and now I'm trying to work on larger areas in one go.
I notice that the pieces have a lot more life and it feels great to be getting things moving!


I notice that the pieces have a lot more life and it feels great to be getting things moving!


Sunday, June 23, 2013
A bit more progress on the fan
'Real Life' intruded and has eaten up the vast majority of my weekend thus far but I did manage to get in some work on the fan handle.

I hope to get better at acanthus leaves...someday...but I'm pretty happy with the pedestal.

I hope to get better at acanthus leaves...someday...but I'm pretty happy with the pedestal.
Friday, June 21, 2013
News. Some good, some...well...?!
The bad news is that acanthus leaves are, apparently, very hard for me to sculpt. I keep applying some paperclay and working it into something almost entirely un-like an acanthus leaf. (Sigh) Perhaps the 4th or 5th or 18th try will be the charm!
The good, but rather surprising news is that I can sculpt faces! (Who knew?) And even some fairly good hair!


My little man is coming together! In fact he is coming together so well that I couldn't resist sticking some feathers in for a peek.

Nice!
The good, but rather surprising news is that I can sculpt faces! (Who knew?) And even some fairly good hair!


My little man is coming together! In fact he is coming together so well that I couldn't resist sticking some feathers in for a peek.

Nice!
Saturday, June 15, 2013
Can't...Resist...! Must...Show Off...Progress!
Still loving the paper clay!

Bit by bit...

It's coming together!

Bit by bit...

It's coming together!

IRCC3-4b: Fan handle in progress...
...Ooooo! that's better!
The plastic wood seems to be providing good framing and structure but it's completely lacking in suitability for fine detail work so after I roughed-in some arms I went looking for an alternative material to use for a sculptural topcoat on my fan handle. I found air-hardening paper clay and I think I'm in love!

The plastic wood seems to be providing good framing and structure but it's completely lacking in suitability for fine detail work so after I roughed-in some arms I went looking for an alternative material to use for a sculptural topcoat on my fan handle. I found air-hardening paper clay and I think I'm in love!

Saturday, June 8, 2013
IRCC 3 - 4b: The great fan adventure continues...
After roughing in the carving for the handle I cut a groove across the top plate of my handle base and inserted a craft wood oval to provide support for the feathers of my fan and also the fantastic animals which project to the sides.

Since I couldn't find my coping saw, or any of my other, more suitable, saws. I made the grove by working at it a whole lot with a combination of the tools I could find, a drywall saw, chisel and my wonderful hand drills. Really, the proper tools would have made this stage a whole lot easier but, as you can see, it worked!

I glued the craft wood oval into place with ordinary white glue and let it dry overnight.

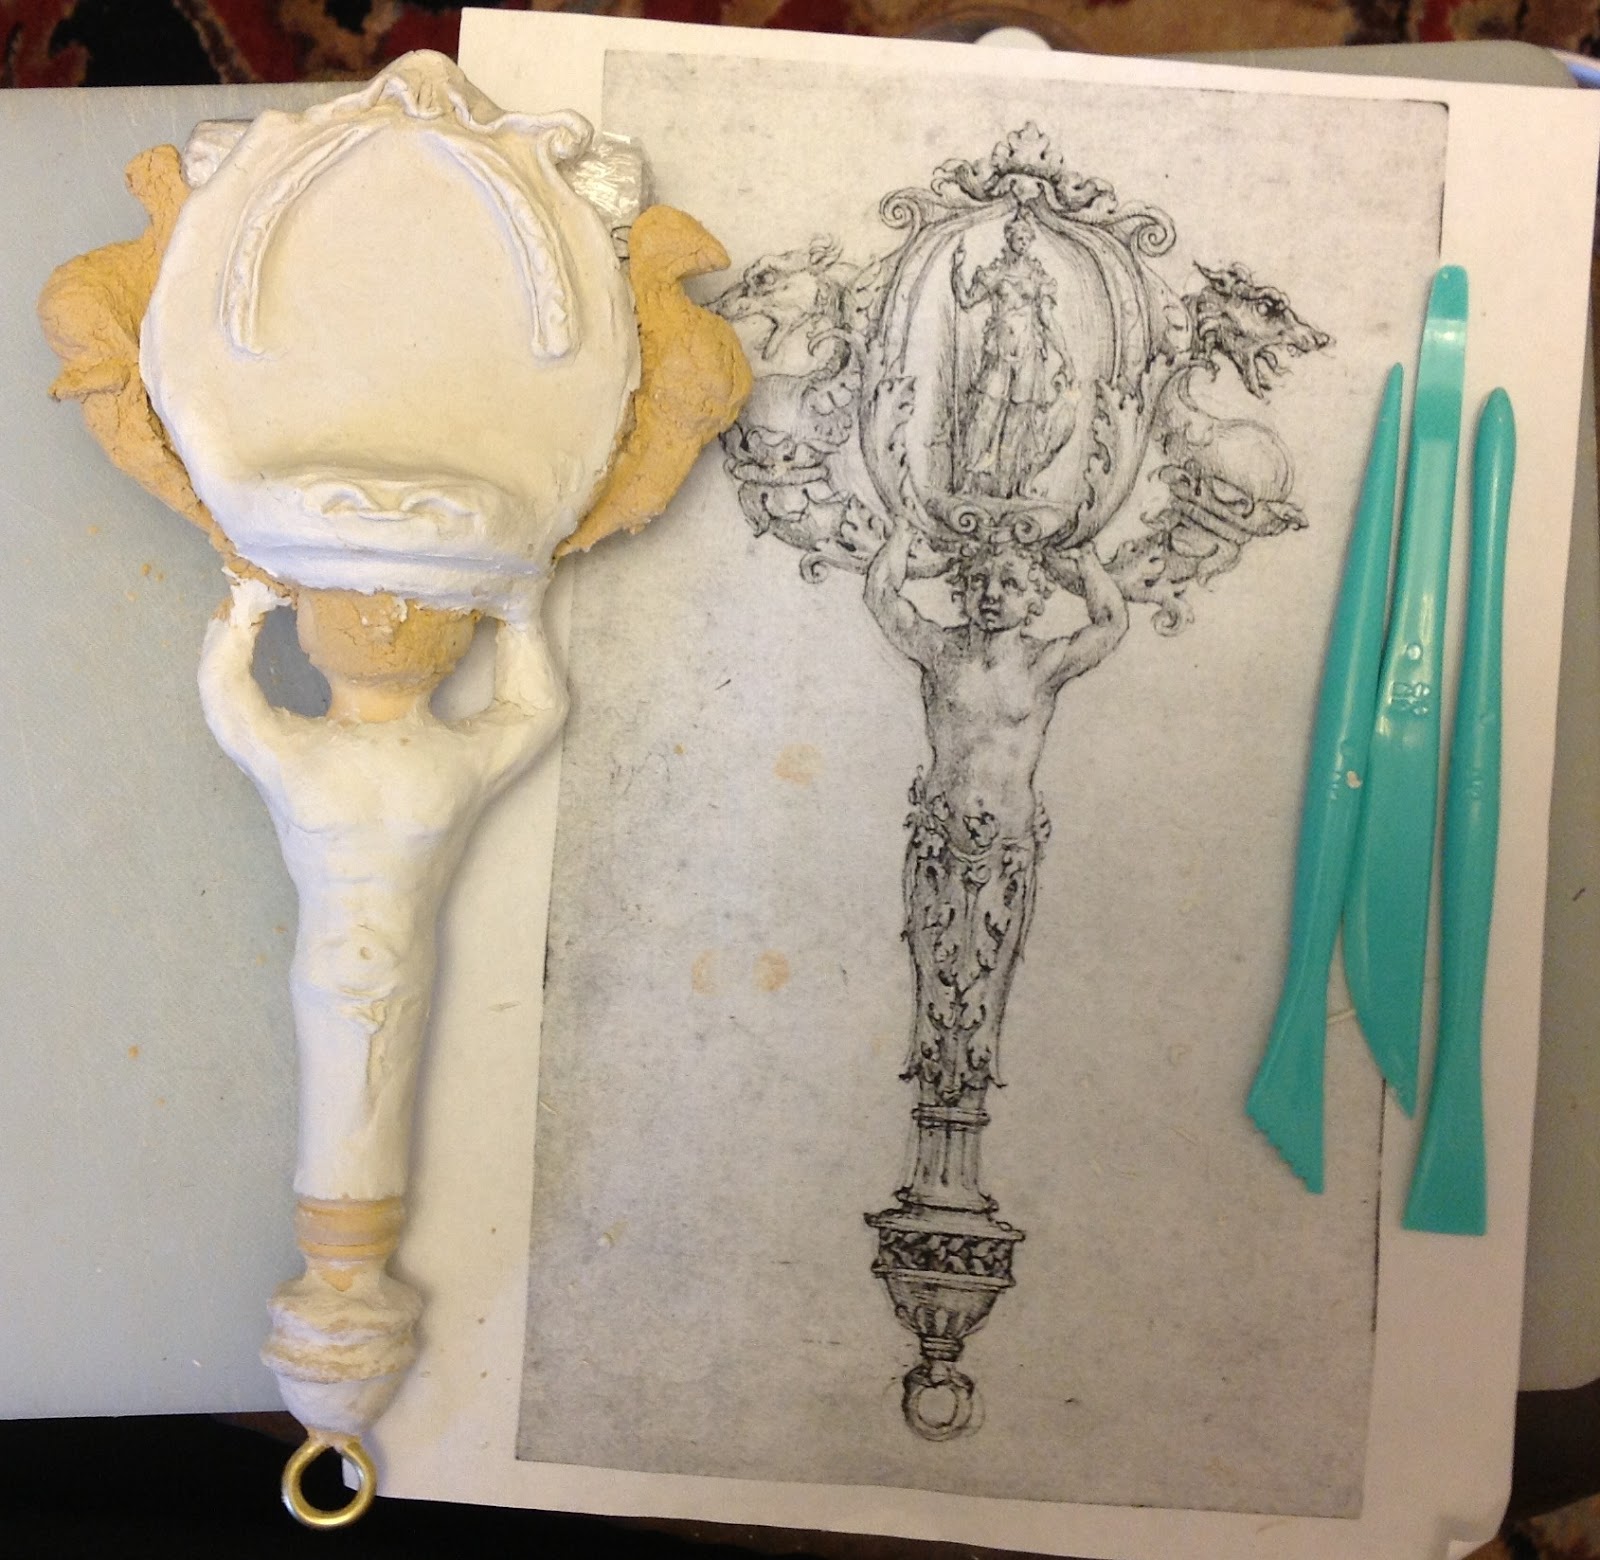
Then I sized Orsi's original design to the appropriate scale and printed it out so that I would have a reference for the next stage-modeling the figures!
I should probably mention that I have been very tempted to just finish the fan handle at this stage. It is very comfortable to hold and has a lovely shape. All that is needed is some smoothing, sanding, and a cover for the place where the brass ring joins the wood and it would be ready to paint. But it wouldn't be Orsi's fan. :) Thus, I persevere.
Although I cannot find it at present, another period artwork inspired me to try making a feather fan in which one side is white feathers, the other black, and you see the reverse color where the feathers curl over at the tips. Since I've given my handle a central support structure I need to create spaces between that central piece and the outer cover in which to insert my feathers.

I stacked up cut up pieces of a cardboard box and sections of the cardboard core of a paper towel roll until they seemed thick enough and then wrapped them in plastic wrap in the hope that the plastic wood won't adhere.

I tied the assembled spacer to my framing with thread. I hope it will be easy to cut free when the time comes.
Next up: Plastic wood! I started applying the plastic wood at the acorn knob at the bottom of my fan and discovered that it doesn't really mold and model in the way I remember. It is too soft at the start, and cracks and flakes off as it dries as I'm working it. Furthermore, it doesn't really want to adhere to the existing framework. It seems to respond best to repeated tapping and thinner layers so I am going to try roughing in the sculpted shapes I need and adding in depth and detail in layers.
Here is my first pass at side one.

It doesn't look like much right now, but I think it has potential.

Since I couldn't find my coping saw, or any of my other, more suitable, saws. I made the grove by working at it a whole lot with a combination of the tools I could find, a drywall saw, chisel and my wonderful hand drills. Really, the proper tools would have made this stage a whole lot easier but, as you can see, it worked!

I glued the craft wood oval into place with ordinary white glue and let it dry overnight.

Then I sized Orsi's original design to the appropriate scale and printed it out so that I would have a reference for the next stage-modeling the figures!
I should probably mention that I have been very tempted to just finish the fan handle at this stage. It is very comfortable to hold and has a lovely shape. All that is needed is some smoothing, sanding, and a cover for the place where the brass ring joins the wood and it would be ready to paint. But it wouldn't be Orsi's fan. :) Thus, I persevere.
Although I cannot find it at present, another period artwork inspired me to try making a feather fan in which one side is white feathers, the other black, and you see the reverse color where the feathers curl over at the tips. Since I've given my handle a central support structure I need to create spaces between that central piece and the outer cover in which to insert my feathers.

I stacked up cut up pieces of a cardboard box and sections of the cardboard core of a paper towel roll until they seemed thick enough and then wrapped them in plastic wrap in the hope that the plastic wood won't adhere.

I tied the assembled spacer to my framing with thread. I hope it will be easy to cut free when the time comes.
Next up: Plastic wood! I started applying the plastic wood at the acorn knob at the bottom of my fan and discovered that it doesn't really mold and model in the way I remember. It is too soft at the start, and cracks and flakes off as it dries as I'm working it. Furthermore, it doesn't really want to adhere to the existing framework. It seems to respond best to repeated tapping and thinner layers so I am going to try roughing in the sculpted shapes I need and adding in depth and detail in layers.
Here is my first pass at side one.

It doesn't look like much right now, but I think it has potential.
Saturday, May 18, 2013
IRCC3 Layer 4b - Fan handle in progress
I too am inspired to make an interpretation based on Lelio Orsi's lovely fan design held in the collection of the British Museum. I'm not much of a carver so I had been thinking about the possibility of sculpting in fimo over a metal wire armature...but it just strikes me as being to flimsy, especially at the attachment points for feathers and a girdle cord.
While pondering, it struck me that the shape of the common craft-wood candleholder strongly echoed the overall outline of the handle section of Orsi's design and I think that as it is actually made of solid wood it could probably endure the rigors of a metal eye bolt so I'm starting with a candle holder as my armature.
I've removed the brass cup which is supposed to protect the wood from candle flames and started shaping the wood by flattening the front and back of the main stem and original foot. I also removed the original cup portion and reshaped the remaining wood to something closer to the acorn/knob shape before the ring on the original design.

Craft basic

My version so far
Orsi's design
My plan is to Frakenstein this basic handle together with some pieces of craft wood, wire and an eyebolt, sculpt on detailing in plastic-wood (and possibly sculpty for the cameos) gild it and attach feathers.
I'll keep you posted. :)
Sunday, November 27, 2011
DONE!
The second lacis piece is all stitched up at last. I'm still pondering my fall-back treatment for the stick...maybe carved and painted?

Anyway, I expect the lacis partlet to be a long term project. Just making the netting is gonna take a while so it will probably be a while before you see more lacis from me (after this fan is done, of course.)
Not to worry, I have lots of other projects to work on!
Friday, November 25, 2011
Just another case of belated cleverness
So today I finally got to the store and bought the thread I need to finish my 2nd lacis fan (and the proposed lacis partlet too, btw) and while I was there I bought sculpty in several colors to try making an 'ivory' fan.
Mixing canes of various colors was looking pretty good for the ivory so I took out my 3/8" dowel, cut in some grooves for the fan's wire frame to run in, and started covering it with the plastic clay...only to discover that it was going to turn out way too thick. OK, plan 2! I took out my 1/8" dowel and started covering *it* with the plastic clay...looking pretty good...I only have to sculpt and bake it....
Oh...wait minute...
I have to bake it...in the oven...rats!
I've tested it out and there is no way a 3' length of dowel is going to fit in my current oven. (Sigh, I really miss my fancy stove which is back in New York state.) I've decided to keep the 'ivory' and try it out a fan with a shorter handle so it's back to the drawing board for the stick treatment for this fan. I guess it's good that I still have some stitching left to do!

Subscribe to:
Posts (Atom)


