Showing posts with label IRCC 3. Show all posts

Wednesday, August 7, 2013

IRCC3 - Sottana skirt is assembled!

I finally finished all the stiching and my skirt pieces are together. As you can see, I still need to figure out the shape of the train (and possibly piece in some more triangles to soften the curve, but I am happy to say that I like the look, there will still be enough at the waitline for gathering, and I think there is enough sweep at the bottom that I won't feel like I am wearing a column dress even though I only used 2 1/2 lengths of fabric. (OK> Techcnically it is 3 lengths and 2 1/2 breadths. I hope I didn't confuse you. :) )


The view from inside - You can see all the pieces, front panel, two triangles from the 1/4 width piece, one triangle which was removed from the back panel and flipped, back panel


A close up of the inside seams


The view from outside - Once again you can see all the pieces


A close up of the outside seams

Friday, July 19, 2013

Testing...

Last year after I bought the stunningly beautiful blue silk which I have been afraid to cut I bought a printed linen in a similar pattern to make an under gown and test out a cutting diagram before cutting into the silk. The linen was still patiently waiting in my stash, untouched, but I have finally begun putting it to it's intended use!


The cut:

My fabric was cut evenly at the top of the pattern repeat at one end and a bit raggedly and off the repeat at the other. My skirt length varies from 42" in front to 45" in back and the pattern repeat of my fabric happens to fit exactly into 45" sections so-working from the good end- I cut one full width of fabric, 45" long for the front panel. since I want a train on this dress I used the somewhat raggedy end of the dress length for the back of the skirt. I picked a pattern transition point about 15" up from the edge and measured my 45" skirt length from there. I will eventually curve the button edge of this panel to form the train.

I am using the burial dress of Elanore of Toledo as my starting point for the patterning of the skirt but fabric constraints prevent my skirt from being quite so lavish. After I cut both the front and back panels I had about one and a half skirt lengths of fabric left. I decided to split this piece lengthwise into three sections, 1/4, 1/2, 1/4, so that I would have the full center of the panel to use when making my bodice and as much length as possible for making the sleeves. The 1/4 width panes are being split into triangles and inserted between the front and back panels to create a greater sweep of the skirt at the hemline and help the train to drape gracefully.

Now I just have to sew while keeping my fingers crossed that it works!

As to the sewing itself, I'm finally trying the period method of hemming each piece and then whip stitching them together. I think I like it. :)

Sunday, July 14, 2013

IRCC3 Project 4....something.....done!

I scampered off to the store today to get some more supplies for my golden chain girdle, more acorns and jump rings, but discovered that they did't have any jump rings which compared to the ones on the original acorn chain which I had been using to assemble the belt. Given the choice of going smaller or larger in diameter I went with larger.

I assembled the belt so that the acorns on both ends are top up, pointy end down when the belt is being worn, but that meant I needed to do some fancy maneuvering to end up with two acorns with their caps back to back at my spine and sufficient chain in front to fall under the waist point of a Venetian bodice and also enough dangling chain to hold and use the fan. But not so much the fan dangles on the floor when I'm standing! I think I had it figured out pretty well, but then I ended up making some changes to my belt. So I guess we'll see when it all comes together.


As you can see from the picture, above, the original jump rings were small enough that they drew two links they were joined to together and caused a small gap between the links of the main chain. I loved the intricate, interlace look that gave the girdle, but it also substantially weakened and shortened the girdle so I ended up replacing all the jump rings with my new, larger, rings.


It all hangs quite smoothly, now.

Monday, July 8, 2013

IRCC3 Layer 4b-Fan handle sculpting is complete!

I added the final flourishes to the dragon-leafy things that stick out at the sides of my fan and managed some passable leaf shapes on the lower handle which left me with only the uncharted territory of the back to address. Orsi's design doesn't include a reverse image so I set out to look for something suitable...without much luck until I had the happy thought of looking at Orsi's's other work and found this frieze with a suitable cartouche

Ornamental Frieze

Lelio Orsi (called Lelio da Novellara)  (Italian, Novellara 1508/11–1587 Novellara)


Some day I'll actually have a registered device which I will paint onto it!


Back


Front


Hopefully I'll move on to painting tomorrow.

Saturday, July 6, 2013

IRCC3 Layer 4c - Veil finis!

Or, rather; Il mio velo รจ finito!

I am saving the final 'as worn' photos for the unveiling of our finished projects ('Unveiling!' Get it?) but here is my new veil in bits and pieces.

The shape:

I've been pondering the shapes of veils in the Spanish tailors book, and the intriguing veil ends which continue up over the chest to tie behind the neck in some illustrations, and the basic 'no waste' thought process which underlies rectangular construction methods...smooshed all together. I took my rectangle of veil cloth and folded it in half--head to foot--and then found the midpoint on each side. I cut a swoopy s-curve shape from the center back fold line to the mid-point, pivoted and attached the pieces to the main body and created a HUGE sorta semi-circular veil with long tails.


I hemmed the edges with repeated passes of zigzag stitch and folding (taking advantage of the opportunity to straigten the edges as I went along)


and then braided the dangling threads at the tips. I think the braid puts the excess thread to good use, extending the length of the ties and making a cord that will be very easy to tie behind my neck.


In the end I am hoping for a semi-circular version of this


As a final little trick, I adapted a ruff-making tip I learned from Noel Gieleghem's excellent ruff-making directions and stitched a small marker at the center point of the leading edge of my veil. It's not really noticeable but I can feel it when I run the edge of my veil through my fingers and I'm sure it will help me keep it centered when I'm pinning it into my hair.


Saturday, June 29, 2013

IRCC3 Layer 2: Another blast from the past.

I know that I want to make up a dress from the terrifying, beautiful, blue silk I bought (but never used) for IRCC2. I've been fretting and pondering and wondering "how am I gonna get a dress-preferably with sleeves-out of a mere 3 yards of fabric?" "And a train! I want a train! Can it even be done?" After working myself into a veritable tizzy I went looking at my posts from last year to remind myself just how stunning that silk is...and discovered I have nearly 5 yards or it!


Now I distinctly remember working myself to the same spot of frozen panic last year. But this year? Hey, I just found out I have an *extra* two yards of fabric! I can do this!


Ooooo.....soooooooo pretty!

Sunday, June 23, 2013

"What's that?" you say. That, my friend, is a big heap of veil!

I'm a natural fiber girl, by preference, but I'll make exceptions for a synthetic fabric that really gives the feel of what I'm trying to represent. Thus, after I became enamored with striped veils during the IRCC2 I snapped up a remnant piece of sheer curtain fabric that hit nearly every point I was looking for. It's an off-white to complement my complection and hide dirt, it's really sheer, it has widely spaced stripes, and those stripes have depth in comparison to the rest of the fabric. Although I would have preferred a silk with a stripe of black or gold, at a width of 110" and a price of about $1.50 this was the perfect fabric!

One of the nice things about not even starting projects you planned to do for an IRCC is that sometimes they are still waiting when the next one comes round. Today I took a little look at the veil patterns I found last year, took up my fabric and scissors and set to. I've only got the first seam finished but I am loving the look of the fabric and feeling good about the shape. I can hardly wait to see how it comes together!

A bit more progress on the fan

'Real Life' intruded and has eaten up the vast majority of my weekend thus far but I did manage to get in some work on the fan handle.


I hope to get better at acanthus leaves...someday...but I'm pretty happy with the pedestal.

Friday, June 21, 2013

News. Some good, some...well...?!

The bad news is that acanthus leaves are, apparently, very hard for me to sculpt. I keep applying some paperclay and working it into something almost entirely un-like an acanthus leaf. (Sigh) Perhaps the 4th or 5th or 18th try will be the charm!

The good, but rather surprising news is that I can sculpt faces! (Who knew?) And even some fairly good hair!


My little man is coming together! In fact he is coming together so well that I couldn't resist sticking some feathers in for a peek.


Nice!

Saturday, June 15, 2013

Can't...Resist...! Must...Show Off...Progress!

Still loving the paper clay!


Bit by bit...


It's coming together!

IRCC3-4b: Fan handle in progress...

...Ooooo! that's better!

The plastic wood seems to be providing good framing and structure but it's completely lacking in suitability for fine detail work so after I roughed-in some arms I went looking for an alternative material to use for a sculptural topcoat on my fan handle. I found air-hardening paper clay and I think I'm in love!

Saturday, June 8, 2013

IRCC 3 - 4b: The great fan adventure continues...

After roughing in the carving for the handle I cut a groove across the top plate of my handle base and inserted a craft wood oval to provide support for the feathers of my fan and also the fantastic animals which project to the sides.


Since I couldn't find my coping saw, or any of my other, more suitable, saws. I made the grove by working at it a whole lot with a combination of the tools I could find, a drywall saw, chisel and my wonderful hand drills. Really, the proper tools would have made this stage a whole lot easier but, as you can see, it worked!


I glued the craft wood oval into place with ordinary white glue and let it dry overnight.


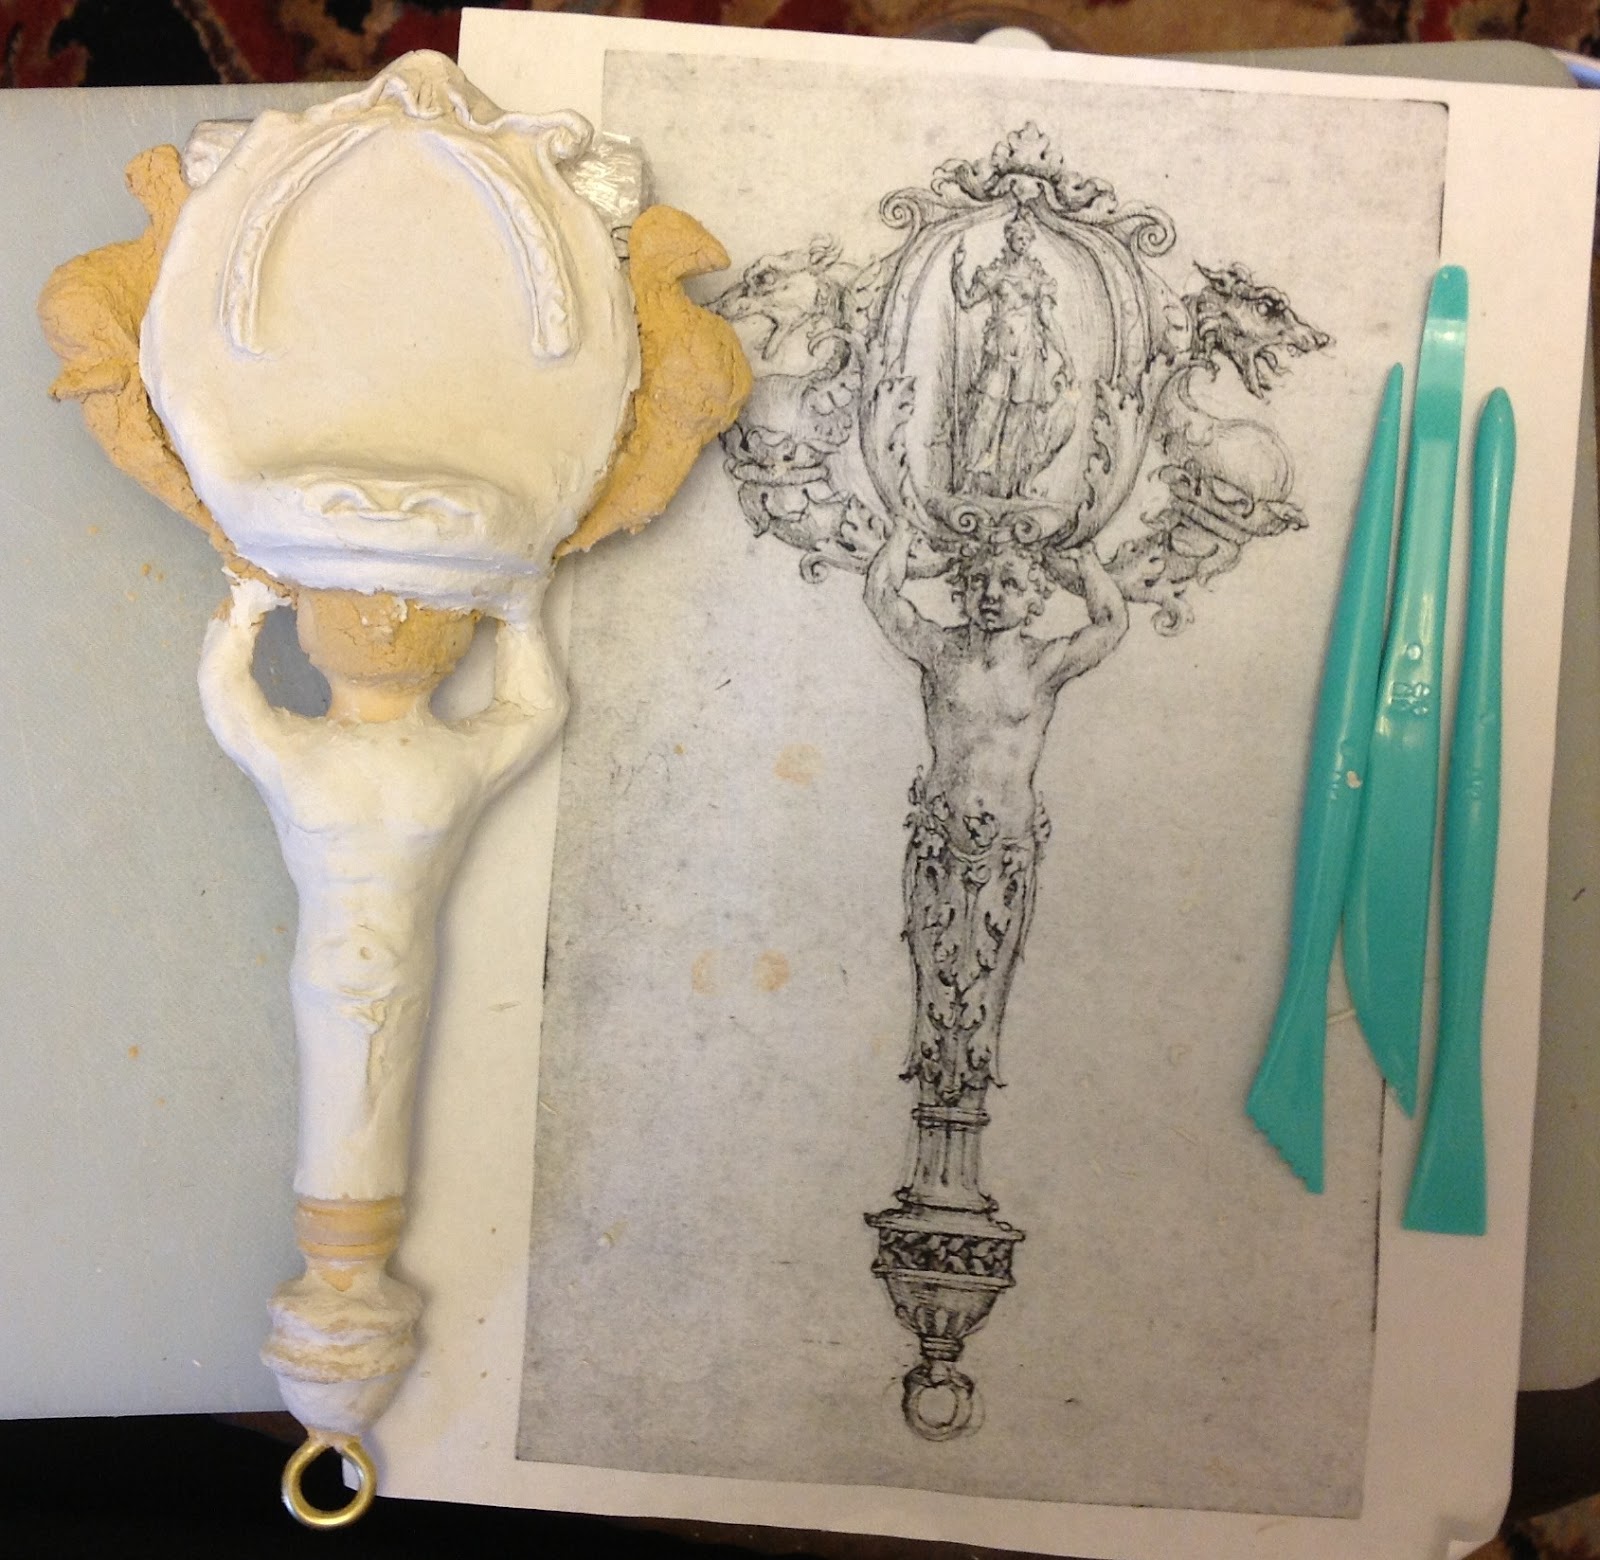
Then I sized Orsi's original design to the appropriate scale and printed it out so that I would have a reference for the next stage-modeling the figures!

I should probably mention that I have been very tempted to just finish the fan handle at this stage. It is very comfortable to hold and has a lovely shape. All that is needed is some smoothing, sanding, and a cover for the place where the brass ring joins the wood and it would be ready to paint. But it wouldn't be Orsi's fan. :) Thus, I persevere.

Although I cannot find it at present, another period artwork inspired me to try making a feather fan in which one side is white feathers, the other black, and you see the reverse color where the feathers curl over at the tips. Since I've given my handle a central support structure I need to create spaces between that central piece and the outer cover in which to insert my feathers.


I stacked up cut up pieces of a cardboard box and sections of the cardboard core of a paper towel roll until they seemed thick enough and then wrapped them in plastic wrap in the hope that the plastic wood won't adhere.


I tied the assembled spacer to my framing with thread. I hope it will be easy to cut free when the time comes.

Next up: Plastic wood! I started applying the plastic wood at the acorn knob at the bottom of my fan and discovered that it doesn't really mold and model in the way I remember. It is too soft at the start, and cracks and flakes off as it dries as I'm working it. Furthermore, it doesn't really want to adhere to the existing framework. It seems to respond best to repeated tapping and thinner layers so I am going to try roughing in the sculpted shapes I need and adding in depth and detail in layers.

Here is my first pass at side one.


It doesn't look like much right now, but I think it has potential.

Saturday, May 4, 2013