Monday, February 28, 2011

Ooo! More stuff from the stash

While I was poking around in my box of trims I also came across this


Short blue fringe

and this


Blue velvet, black cord and "gold" trim

I have a theory that fringed edges may help keep bugs out of the tent, so I'll probably use the fringe on the bottom of the door curtains, but where else? The doorway opening?

Would it be strange to use it at the bottom of the mottoe band, even though the tent walls don't seperate there?

And the other trim...what to do with you....

Wow. Gold ribbon? NICE......

I am so glad I looked in my stash. The ribbon is magnificent on the lettering. There is really no other word for it. It sparkles--even in the dark. It is just the right size. And strangely the weave of the ribbon even makes it look like the whole letter was embroidered in satin stitch. (But all I had to do was stitch the edges down. Woo hoo!)

I have no idea if it will hold up once it is out in the elements, but I am really glad I decided to try it out. Below, see the wonders of what cheap-o "gold" ribbon can do in the right application:


The lettering on my Pavilion, in progress

Saturday, February 26, 2011

More is More

As you have probably gathered, I come from the Guild The Lily school of stuff-making for SCA reenactment. This explains--at least in part--why I started embroidering my doorway panels on Friday. You know how it is; it snows 14 inches, you haven't decided how you are going to approach the next scheduled task (the mottoe, in my case), embroidery is *way* down the list in the 'if I have time' section of the plan but you suddenly feel like winter will *never* end and you might as well keep busy...

So anyway, I had a ball of thin black crochet cotton sitting around which I am now couching down around the outline of my applique. I've never done couched embroidery before (so I'm probably doing it all wrong) but it goes very quickly thus far (one day and I'm practically done with the first doorway panel--fire) and it makes an amazing difference!


As promised, Pictures!

In other news, I remembered that I have a large quantity of metallic gold ribbon hiding out in my fabric stash. I had absolutely zero plans for it--it was just too good a price to pass up, back in the day--so I've decided to use it to make the letters of my mottoe. I'll be stitching on two widths of the ribbon for the thick parts of my letters and one width for the thin parts. We'll see how it goes.

Wish me luck!

(BTW, if anyone wants to share a Latin translation for "more is more" I'd be very grateful!)

Wednesday, February 23, 2011

Done at last!

OK, it's just step 1, but I'm done with the applique for the doorway.

Done! Done! DONE!!!!

(Thank goodness.)

And they came out rather nicely, don't you think?


The completed applique on the four door panels

I needed a bit of inspiration to continue going forward, so I decided to lay the door way out on the floor for more pictures. Keep in mind that the *actual* tent will be 6 feet wider and 3 feet taller--and three dimensional--but here is a taste of ...


The front door of the Pavilion

and


The back door of the Pavilion

To keep up my tradition, here are detail shots of the last two elements:


AIR

(which you may notice got a small bit of trapunto) and


EARTH

As I said...Done! Done! DONE!!!!

Now on to the next stage of the plan...the Mottoe.

I've been cutting out the pattern pieces for the text and I've been slowly and reluctantly coming to the conclusion that maybe I should rethink the idea of applique for the mottoe. I'll make the final decision when I go shopping for materials this weekend, but at the moment I am leaning towards embroidery after all. (It's all the fiddly bits on the letters.) Stay tuned!

Saturday, February 19, 2011

Inspiration

A link to a site which has captured my imagination, answered my questions, and beguiled my time on many occasions...


Support disk after conservation

http://www.dhm.de/restauratoren/zelt/start.htm

It is the diary of the Deutsches Historisches Museum conservators restoration of a Turkish tent captured in 1683. (But dated earlier as I remember.) The links on the left go to German text, the ones on the right are in English.

Absolutely beautiful!

More importantly it is full of details on the materials, construction, conservation and erection of the pavilion.

And, as I said, absolutely beautiful!

Thursday, February 17, 2011

In other news...

Last time we had the camera out I also took pictures of some of the other (semi-completed) parts of the tent. I am still stitching away on the AIR panel and so, since I have nothing new to report on my door panels, I thought I'd post them.

The Piece That Started It All


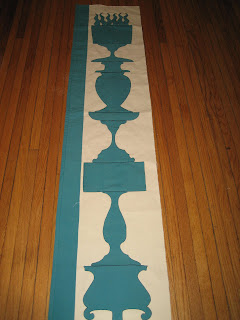
Yes, this is one of my 2 triangles of assembled pieces which I mentioned in my first post. The bad news is that I still need to figure out how to extend it by about 3 feet in length but the good news is that I have an idea!

The Awning / Door Flap /Front and Back Wall Pieces


I have two of these. They just need the banding on the bottom edge and they will be ready to sew into the center section of the tent...as soon as everything else is ready.

I'm also including detail shots of the banding


Back to work for me!

Wednesday, February 16, 2011